Creating a 2K DCP from HD
This article demonstrates a fast and effective way to create a DCP (Digital Cinema package) that meets the requirements for screening in Ster Kinekor cinema’s in South Africa, using only a 1920×1080 Prores or equivalent Export and free software. The Ster Kinekor Cinema’s have recently upgraded all their projectors to “Christie Solaria One“.
The software we will be using is MPEGStremclip and OpenDCP.
It has to be said that creating a DCP using a HD file is not ideal. The DCP format can store much more colour information than a Prores 422 file, and since the resolution is larger some scaling will occur. Thus if you are following a professional online-edit and colour-correction workflow, you should export to DCP directly from your online package. For many editors this is not possible; either their source footage is only HD, which is very common for documentary projects and lower budget productions. If this is the case, the workflow below will work perfectly for you.
Let’s start by looking at what specs SterKinekor requires the DCP to be delivered.
Video:
Resolution: 1998 x 1080 (1.85 aka FLAT) / 2048 x 858 (2.39 aka SCOPE)
Codec: JPEG2000
Colour Space: XYZ
Framerate: 24/25
Audio:
Stereo / 5.1 separate WAVE Mono files 48kHz, 24bit unencrypted PCM.
The minimum requirements for admission to the academy awards are the same as above with the exception that it has to be 24fps and Audio must either be 3 channel (Left, Centre, Right) or 5.1
Preparing your HD Video for conversion
I’ll start by assuming you have a Master Export in 1920×1080 resolution with Stereo sound.
We have to re-size this to either fit into 1998×1080 or 2048×858 resolution. Then we have to convert it into a tiff sequence. The image below illustrates how HD fits into the DCP dimensions:
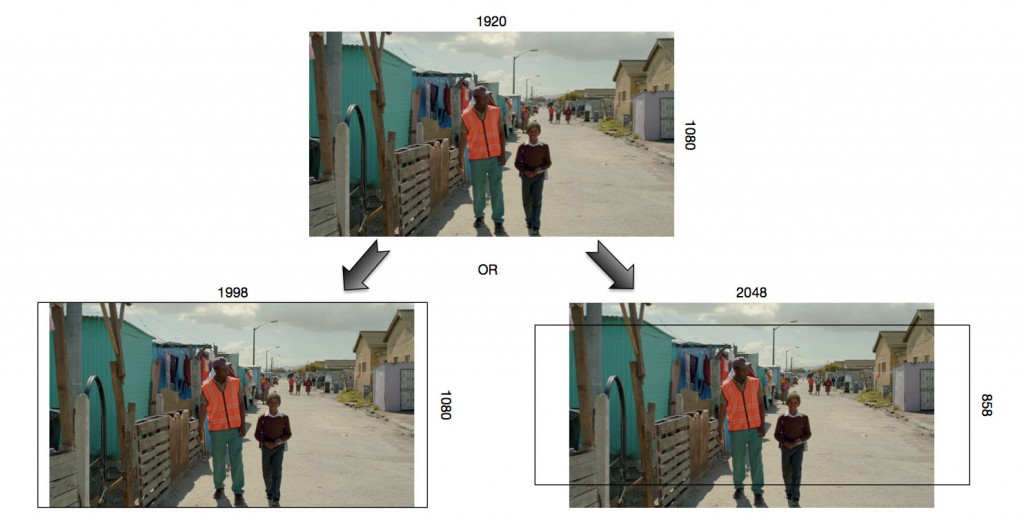
Depending on which format you’re exporting to, you’ll have to scale your image up, and crop the redundant pixels:
The image above shows the amount of pixels that will be discarded at the top and bottom of your image.
Let’s open MPEG Streamclip and open the video file you want to convert. Next, select “File > Export to Other Formats”. You should be greeted with a dialog box that looks like this:
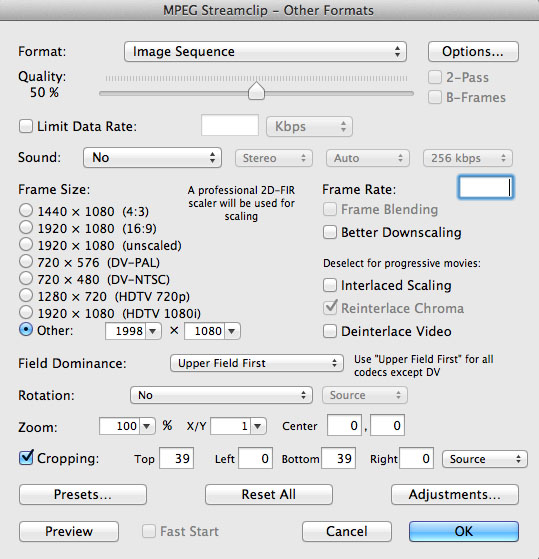
Let’s set the resolution, (frame size) first. I’ve selected 1998×1080, but you can select either 1998×1080 or 2048 x 858.
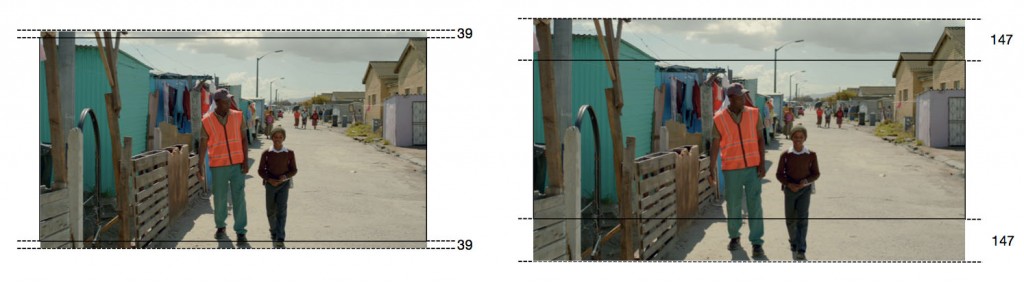
Next we want to crop the image to maintain the aspect ratio, if we don’t, MPEG streamclip will stretch your film to fit the new resolution. Referencing the diagram above, set the crop to 39 pixels above and below if you are exporting a 1998×1080 DCP. If you are exporting a 2048 x 858 DCP, crop the top and bottom by 147 pixels. (If you are not using an HD 1920×1080 file, your crop factor will be different. Rather comment below and I’ll provide you with the correct crop factor)
Make sure that you have selected to crop “SOURCE”.
Sound can be set to “No” since image sequences don’t carry sound.
I’ve deselected “Interlaced Scaling” because my video is progressive.
The last step is to select the format at the top. Change this to “Image Sequence”. I’ve mentioned above that DCP uses JPEG2000, however, we can’t export them yet because they have to be in XYZ colour space. Thus we’ll first export a TIFF sequence, and convert them to JPEG2000’s in XYZ colour space later. Next, click on “Options” next to “Image Sequence”
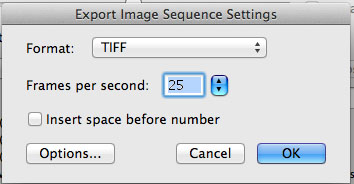
Select TIFF and set your Frames per second. This can either be 25 or 24, but it must match your video file and must never be changed during this export. Deselect “Insert space before number” as the space will confuse the numbering later. Click “Options” again.
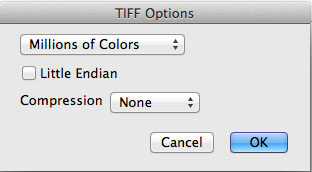
You’ll notice a few options regarding the amount of colours to save. Most Video files are only 8bit and already compressed, thus “Millions of Colors” are more than enough. If you are sure you have a 16bit Video file (FCP can only export 10bit), go ahead and select “Millions of Colors+”.
Don’t simply select “Millions of Colors+” because you think it’s going to make your project look better, it won’t. It’ll simply add 6GB of superfluous data per min of footage. Click OK, OK and OK.
You should be prompted to set a filename:
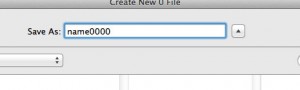
Create a new folder and name it “TIFF exports”, name your file something like: “movieName00000” if extensions are not hidden it should look something like this: “movieName00000.0”. It is important that you add four or even six zeros after the name of the film so that your files will be padded and consecutively numbered. Hit “Save” and you should see this:
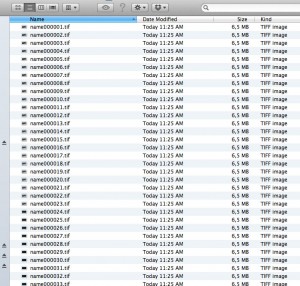
Note: If your files are not padded and look like example below, the conversion will not give you errors but will place the frames in the wrong order:
name 1.tiff
name 11.tiff
name 12.tiff
name 2.tiff
Starting the Conversion process in OpenDCP
We can now open OpenDCP to convert the TIFF files to JPEG2000 in xyz colour space.
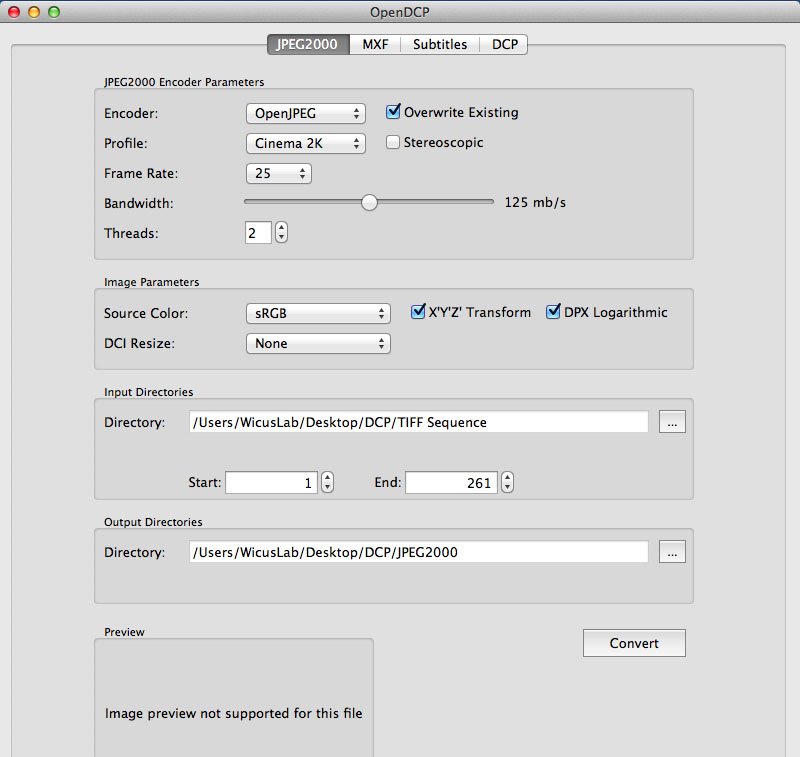
The first tab on OpenDCP creates JPEG2000 in xyz colour space and contains various settings to adjust different inputs and the type of DCP you want to make.
The Encoder will default to “OpenJPG,”. Unless you have another JPEG encoder installed, leave this selected.
The Profile must be set to Cinema 2K to match our resolution. The frame rate is used to calculate image size and does not affect your conversion, in my case it was 25.
Bandwidth refers to the overall bit rate of your JPEG2000 image sequence. A higher value doesn’t always mean higher quality. For a 2K project such as ours 125mb/s is more than enough.
Under “Image Parameters” we need to select the source colour as either sRGB or rec709. This is dependent on your specific video file. Unless you specifically managed the colour workflow of your project to have a rec709 export, you should keep it on sRGB.
By selecting “XYZ Conversion” we will convert the sRGB TIFF files into XYZ JPEG2000 files.
The “DPX Logarithmic” Setting is not relevant to us.
We’ve already re-sized the HD video to the correct resolution so leave “DCI Resize” on “None”.
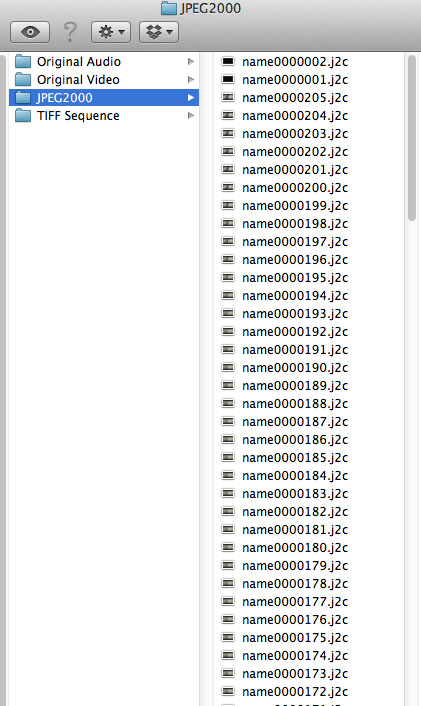
Hit “Convert”, create a new folder named “JPEG2000” and click “OK”. The conversion is a slow process even on a fast computer.
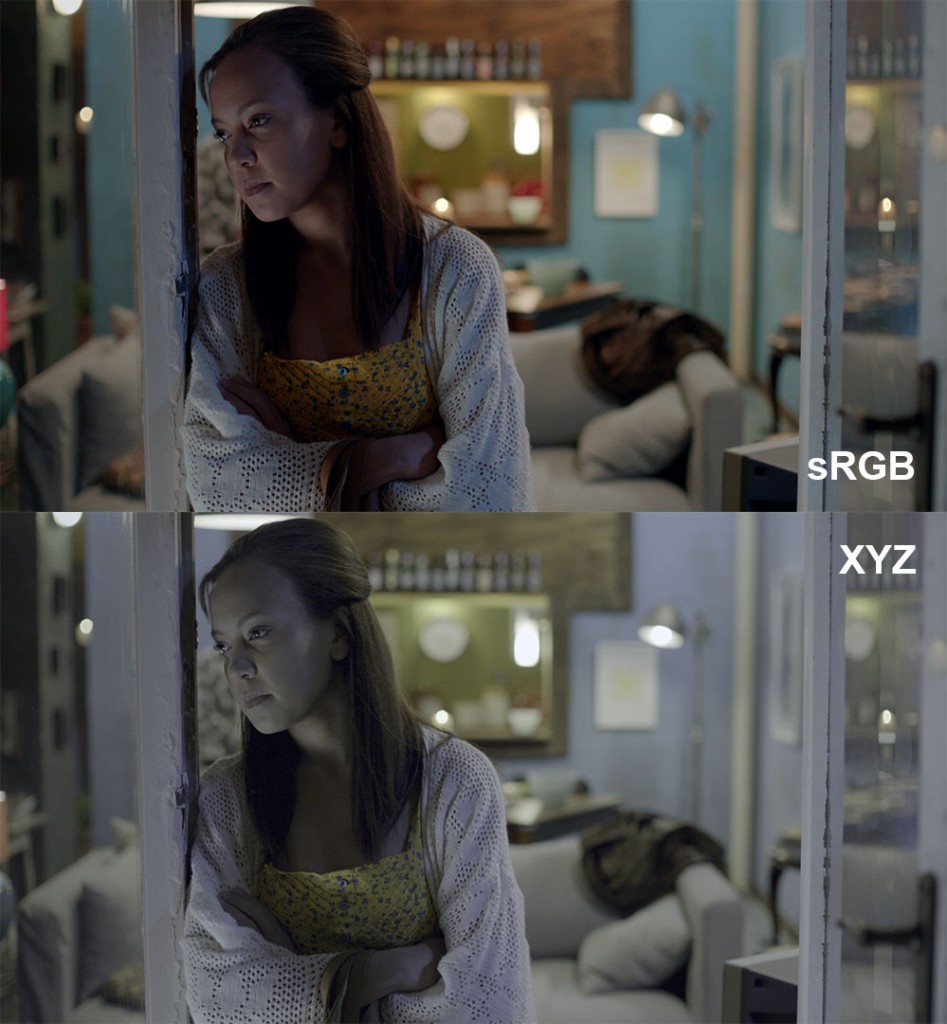
Note that these files will be in XYZ color space and will thus look like this:
You should now see this:
Great, now that we have the frames in the correct format, we need to place them in the correct video file container along with the correct meta data: MXF.
Select “MXF Creator” in OpenDCP:
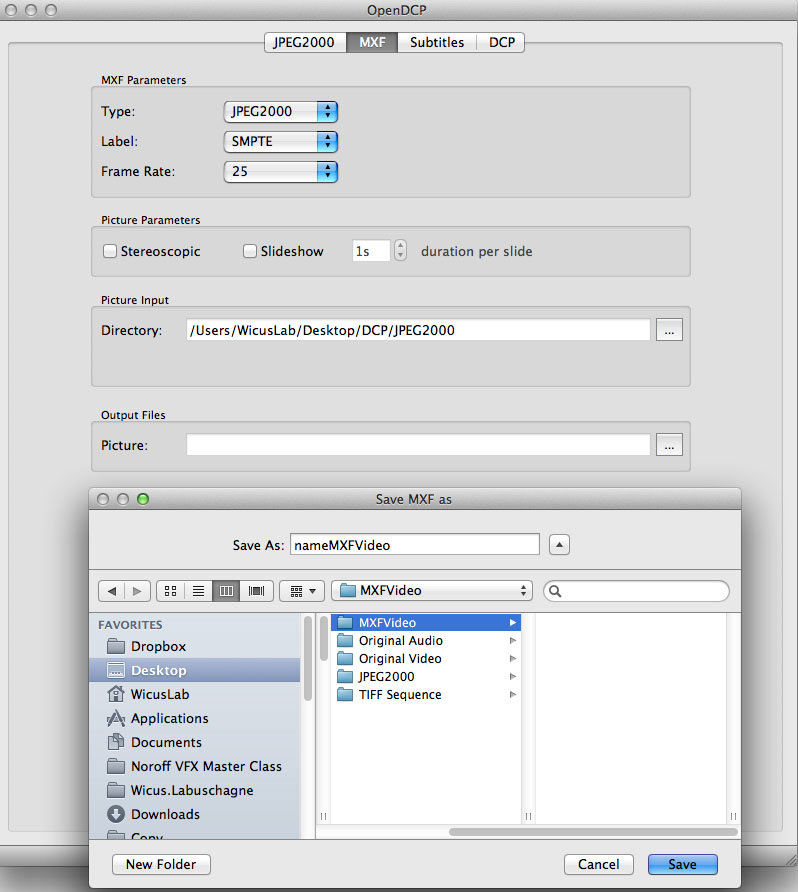
Select JPEG2000 as the source since we’ve just created these files.
Keep the package set to SMPTE (Society for motion picture and television engineers). SMPTE is the newest specification and MXF interop is deprecated.
The frame rate should be set to match your original file, in my case 25.
We’re not exporting a stereoscopic film or a slideshow, so leave those alone.
Next, select the directory where you saved the JPEG2000 sequence, and select the Output directory. Create a folder called “MXFVideo” and save the file as “nameMXFVideo”. It’s important to add “video” to the end because we’ll be creating an audio MXF next.
You should now have a single video file called “nameMXFVideo.mxf”
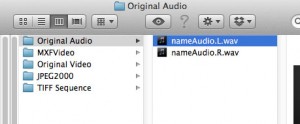
Our next step is Audio. Make sure that you have separate WAVE Mono files at 48kHz, 24bit unencrypted PCM, for the LEFT and RIGHT channel.
In OpenDCP, and still in the “MXF Creator” change “Source” to “WAV”.
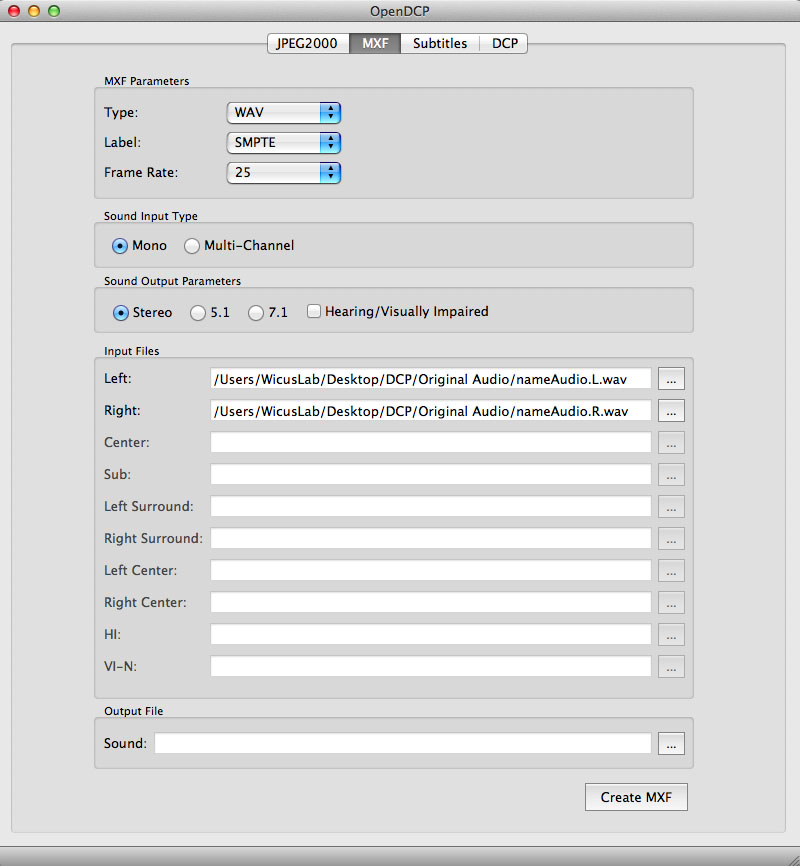
Ensure “Label” and “Frame Rate” is the same as the video, SMPTE and in my case 25.
Sound Input Type is Mono, and output type is either Stereo or 5.1, depending on your file. I used a Stereo Video and selected that.
Add the mono files to the “Input Files” and select an output directory. Create a new directory called “MXFAudio” and name your file “nameMXFAudio”, hit “Create MXF”
Now you should have a video and audio MXF file which can be combined to create the final DCP.
In OpenDCP select the “DCP Package” tab at the top.
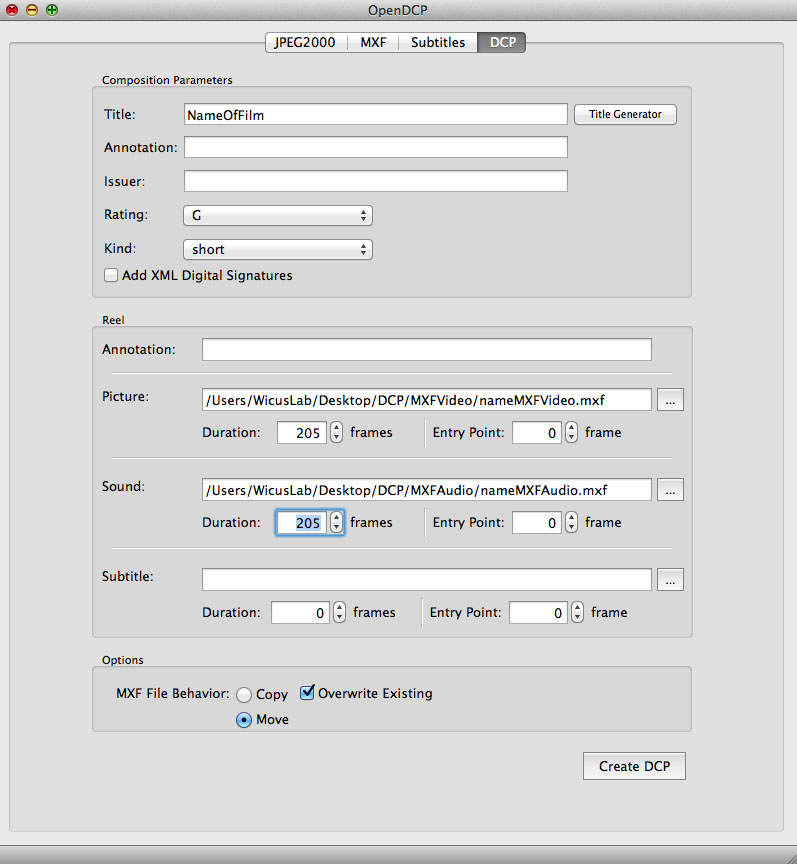
This is the final step to create the DCP.
UPDATE:
It is important that you use the “Title Generator” to name your DCP. The LMS Playback system at Ster Kinekor requires certain meta-data to be present in the name of the DCP for the projector to correctly identify the type of DCP you are creating.
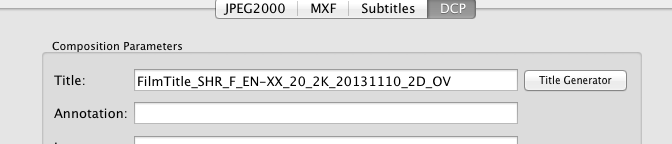
The above name can be interpreted as follow: SHR: Short. EN-XX: English without subtitles. 20: Stereo. 2k: Resolution. Date.
Once you click on “Title Generator” you will be greeted by the following prompt:
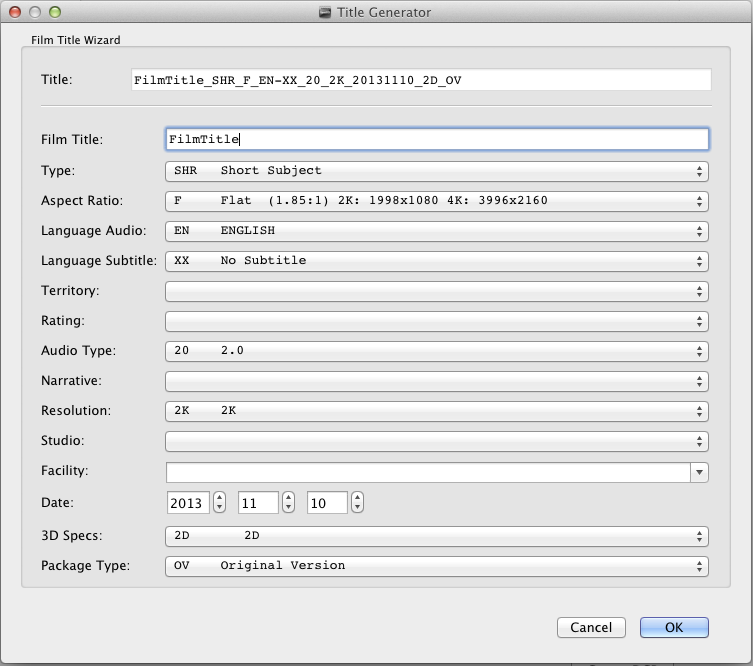
UPDATE: “FACILITY” MUST BE FILLED IN FOR QC AT THE NEWER STERKINEKOR AND NUMETRO CINEMAS
I’ve filled in the most important data above. If the above is not filled in, the projector will not know what audio type or resolution your film is, and will continue to play using the previous settings. The “TYPE” field directly underneath the name is used to sort the media on the Player at Ster Kinekor. This makes it easier to build playlists.
We will use SHORT SUBJECT for films, and TRAILER for Trailers.
Once you have the above filled out click OK.
Now add the XML files to Video and Audio respectively. You need to ensure the duration of all MXF files are the same (if they aren’t, you might have selected the wrong frame rate somewhere). In some cases the Audio and Video might differ by a couple frames. If this happens, you should adjust the audio to match the video. This does not change the content of the MXF files, it simply indicates to the player when to start/stop each MXF.
Hit “Create”, make a new folder called “nameDCP” and your DCP is created.
Your DCP package should look like this:
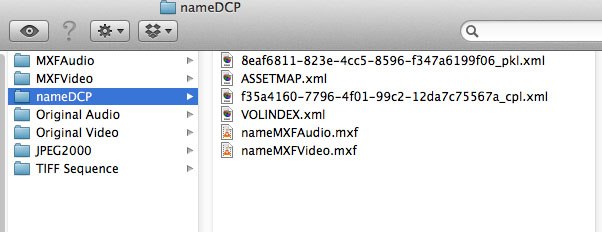
If you want to test your DCP package on your own computer, you’ll have to find DCP player software. They are very expensive but many demo versions are available. Just remember that the video is in xyz colour space, and will thus look low in contrast and saturation with a yellow tint. This is normal, the projector at the cinema will interpret the colours correctly when your film screens.
You are now ready to copy your DCP onto removable media and take it to the cinema for projection!
To give you a better understanding I’ve included some photos of the LMS system where the files are ingested to be played.
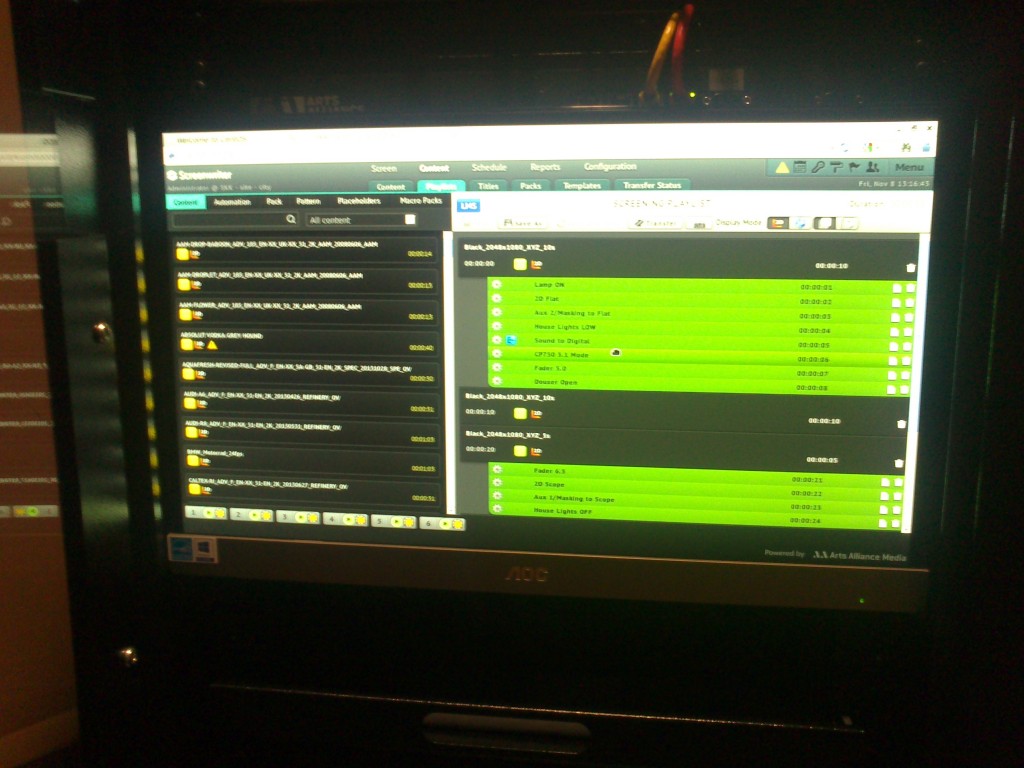
Above is the central LMS (Library Management System) where all DCP packages are ingested, play listed and scheduled to play in all the cinemas. The DCP’s are copied onto a RAID storage unit and then distributed to another RAID drive in each cinema connected to the projector.
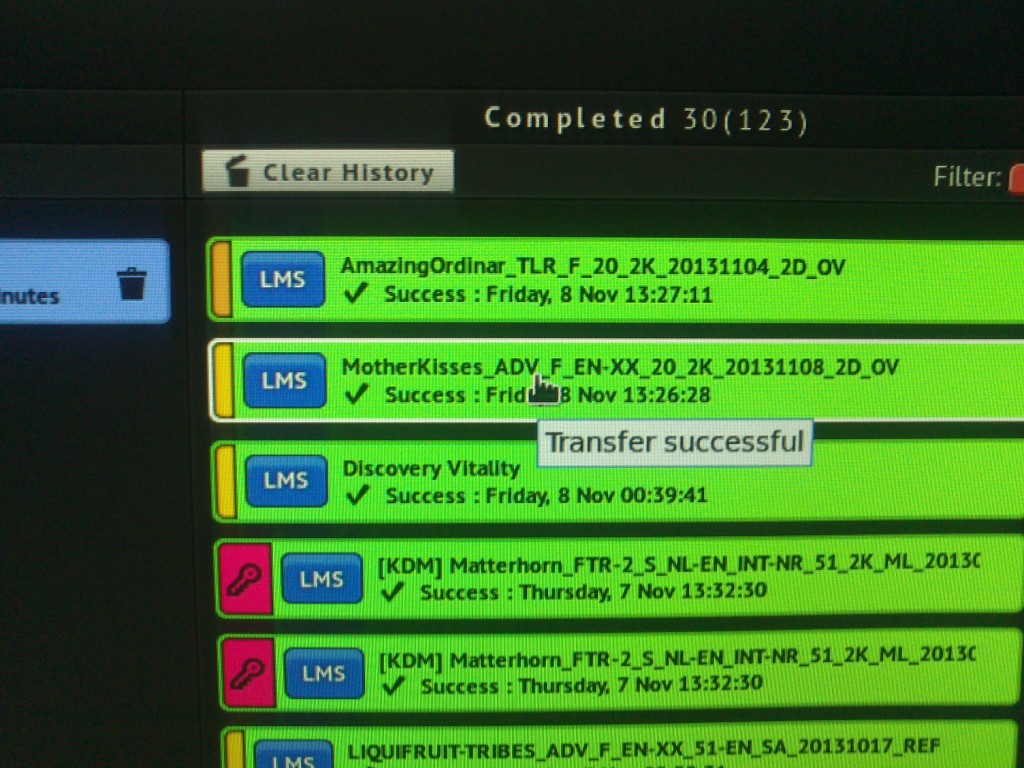
Above you can see DCP packages that have been transferred, at the top: The Amazing Ordinary Story’s Trailer in Stereo 2K 2D. Underneath that is MothersKisses Advert in Stereo 2K 2D, and underneath that a incorrectly labeled DCP without any metadata.
Happy DCPeeing. If you have any questions, feel free to leave a comment, pop me an email or give me a call.
References:
http://code.google.com/p/opendcp/


